Just another WordPress.com site

I taught yoga to over 300 chldren yesterday! 10 sessions back to back with over 30 children age 7 – 11 in each class.

I was rather daunted by the prospect – but it ended up suprisingly ok.

One girl came up to me after a class and looking a little dazed said:

‘ I feel different…’

‘Is that alright?’ I said, ‘ What do you mean you feel different?’

‘ I don’t feel myself ‘ she said, ‘but that was really good! Yoga is awesome!’


Well my 84 year old granny’s back is much improved from doing the very simple yoga exercises that I recommended she do:

From sitting – gentle side bends and rotation of the spine both ways. Then Savasana with knees bent alternating with the beginnings of Setu Bhandasana – getting the lumber spine onto the ground and creating space for the lower vertebrae. Also a little bit of Little Boat – when she can manage it.

I’ve asked her to try and do these movements 2 or 3 times a day. I think she started with 3 times and her back quickly improved – but then it went down to 2  and now – because she’s very busy (!) she usually only manages once a day.

Her back isn’t as good as when she first started the exercises – but much better than when she was doing nothing.

My 83 year old granny has a very bad back. Her doctor says it is ‘wear and tear’. I guess that’s true in some ways – but he didn’t offer any help – just sent her off with some paracetamol.

My granny and grampy decided that the next stop was the chiropractor. At first there was a vast improvement in her condition – but relief was only temporary and only lasted for a few days. She saw him for a few months on and off with no real permanent improvement.  Her last appointment with the chiropractor was a few weeks agoa. I talked to her this morning on the phone (she lives a few hours drive away) apparently her back is as bad as ever…

She did say that she would be happy to do some yoga exercises that I am compiling for her to try and ease her condition. So we shall see and I will keep you posted…

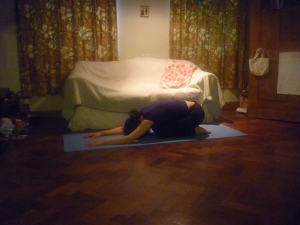
child’s pose – pindasana

Pindasana is a very good posture to do after a forward bend such as Duttanasana or Dog. It can also feel very good for your back after doing a back bend.

Benefits: Lengthens the spine and promotes relaxation in the body. Increases flexibility in the hips. Gives more space to the top of the ankles.

Contraindications: If you have knee problems, go into this posture very slowly and discontinue if you experience any discomfort. You could try placing  a cushion between the pelvis and the feet to lessen pressure on the knee joint. This might also be useful to do if you have varicose veins.

If it’s sore at the front of the ankles, place a rolled up blanket or towel underneath them.

Practice: Come into a kneeling position and gently fold the upper body forwards over the knees. You can either rest the forehead – on your folded forearms – a cushion or two – or on the floor  – if it feels comfortable.

The arms can rest infront of you or be placed alongside the body…

Give into gravity… Relax…Feel the back widening each time you breathe in. When you breathe out – the spine lengthens.

Rest in this posture as long as it feels good to be in…

When you feel ready to come out – walk your hands towards your knees to bring the upper body up and then lengthen the back of each leg out – toes on the ground, with the heel lengthening away.

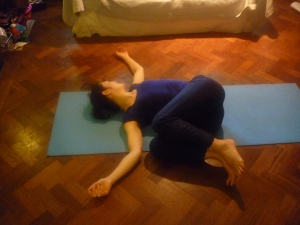
supine twist – supta matsyendrasana

The relaxation teamed with the feel of the spine rotating and something really happening in the body without you even trying  to do anything, makes this one of my favourite postures…

Benefits:  Massages the internal organs and the digestive system; so quite detoxifying! Encourages the shoulders to be more open. Lengthens the spine.

Contraindications: Be careful if you have any back conditions and only do what feels comfortable. Might not be good to do during pregnancy for some women – best to check with your Doctor or midwife on this one…

Practice: Lie on your back and hug your knees towards your chest (Little Boat)… Take a moment to breathe and allow the shoulders to settle…

Hold your legs behind the knees with your right forearm. Slowly bring your knees towards the floor on your right side. (If this feels too strong then place a cushion on the ground for your knees to rest on). Gently look to the left. If you feel comfortable – remove the supporting arm.

Give in to gravity and breathe…

To come back to the centre breathe out gathering your strength in  your abdomen.

Take a moment and breathe….. before doing the other side.


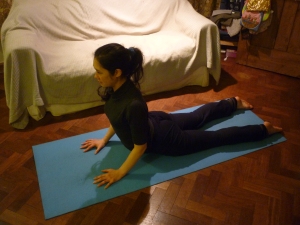
cobra – bhujangasana

BENEFITS:  Strengthens the back muscles. May be beneficial for sciatica. Can be good for rounded shoulders as it encourages opening in front of the collarbones. Increases flexibility in the whole of the spine.  Is said to sometimes help stomach aches…

CONTRAINDICATIONS: Obviously pregnancy puts some restraints on practicing this posture!  Mother’s to be who normally practice this posture will find up until 12 weeks comfortable to do – but listen to your body – and don’t do it if it feels like an effort. We are all unique and different, so only practice if it feels good to do…

PRACTICE: Lie prone with the hands either side of the chest to begin with. The more comfortable the posture becomes – the further down the body your hands can go when preparing for the pose. Keep your eyes looking towards the ground. (You can shut them if you want to…)

Take a journey around your body and see if there is anything still holding. If there is then imagine you are breathing into it. Visualise the area softening and releasing.

Relax and breathe freely and easily…

Notice your hands and the contact they have with the ground…

Feel your spine moving as you breathe…

When you are ready, next time you breathe out engage your thigh muscles. Allow the legs to become heavier and lengthen the tailbone away.

As the upper body becomes lighter, ground the hands and allow  your arms to push you up.

Keep the elbows a little bent – so the arms don’t lock and become stiff . Keeping the arms bent will have the added benefit of helping them to strengthen.

Be aware of keeping the front of the chest and shoulders, wide and free.

Keep length at the back of your neck by allowing the chin be lower (rather than higher).

Enjoy your long spine, strong, (but not locked) arms and broad open shoulders. Breathe and stay for as long as it feels good to do…

Come down gently and then rest in child for a few breaths…

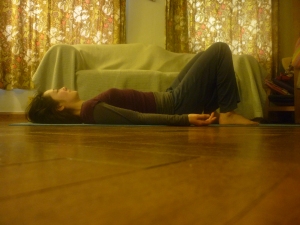
Savasana with knees bent…

BENEFITS: Lengthens the spine. Relaxes the body, mind and spirit. Beneficial for the many systems of the body – especially the immune system. Relieves stress.

CONTRAINDICATIONS: This is one of the safest yoga postures you can do, but as with all postures of the week, only practice if it feels comfortable… Often late in pregnancy lying on your back can make you breathless. This is because the heaviness of the uterus can compress a large blood vessal  (the vena cava) when supine. This will lessen the blood flow to the heart which will cause a drop in blood pressure and decrease the amount of blood getting to your baby.

You will feel the discomfort almost immediately if  it isn’t going to be a good posture for you or your baby.

PRACTICE: Savasana can be done at any time – but is often practiced briefly at the beginning of some yoga classes and usually always at the end of a session for between 5 – 10 minutes.

Lie on your back and gently hug your knees towards you.

Have an awareness of your breathing and then gently let your knees fall away from you as you breathe out. Place the feet on the ground about shoulder width apart.

If you are doing savasana at the end of a class you might like to straighten your legs…

Give the weight of your body to the ground and breathe…

Let every part of you be heavy and weighted…

Really trust that the ground is there – so you can fully be supported by it and let go. The body can then widen and broaden – especially on the in breath…

Allow the joints to be quiet…and a softness to flow over you – an easiness, a release, a relaxation….

Breathe… and have an awareness of the spine gently lengthening each time you breathe out.

When you are ready to finish, slowly wake the body up and roll over onto your side. Stay here for at least half a minute, to allow your body to adjust before coming upright.

When you are ready to sit up – use your hands to help you get up. This will protect your abdominal muscles and keep your spine nice and long.


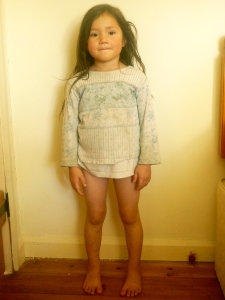
tadasana…

Tadasana is one of the basic standing postures in yoga.

BENEFITS: Good for lengthening and realigning the spine.  May ease backache. Can improve leg and abdominal tone.

CONTRAINDICATIONS: Tadasana seems to be one of the safest postures to do – but as with all the poses of the week – only practice if you feel well and if the position feels comfortable for you to do.

PRACTICE: Stand with your heels directly underneath your sitting bones – a little narrower than your hips. Have the outside edges of your feet comfortably parallel. Take a moment to breath and then allow the lower half of your body to become heavier, so that the feet can really imprint themselves in the ground. In contrast to the earthing of the pelvis, feet and legs, the upper half of the body becomes lighter and is very much attracted upwards. Breathe easily and freely and enjoy the feeling of length and solidity…

Dizzy!

At the playground, I went on a swing  – which I haven’t done for a while. I felt like I was losing my stomach every other second – definitely as dizzy as I used to be. I was squealing a bit and my middle child Esmée reminded me to “Look at your hand!” I did and after a few swings felt better and could enjoy it again.

One of my yoga students has been suffering from positional vertigo. This is a type of dizziness that occurs when a person rolls in bed, bends over, or looks up. It is caused by crystals in the inner ear that are out of their normal position. Her GP recommended she do something called the Epley manoeuvre on a regular basis to settle the crystals into their proper place. She is now much better.

The Epley manoeuvre is really simple to do and I find it astounding that you can actually heal something so delicate in your inner ear in such an easy way. Amazing!

One of my youngest students (age 3) on hearing that she was about to

go to one of my children’s yoga classes, told her granny she was

“thirsty for yoga.”

That made me smile all week!

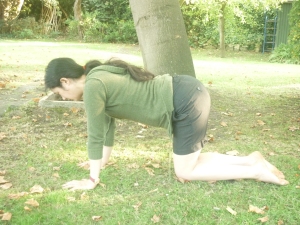
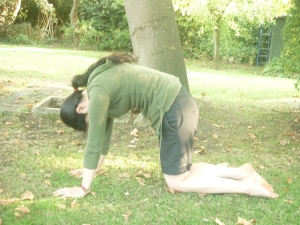
BENEFITS: Increases flexibility of the spine. Tones and strengthens the abdominal and back muscles.

CONTRAINDICATIONS: If you have weak wrists or carpal tunnel syndrome, you might like to rest your forearms on some cushions or a low chair.  As with all poses of the week – if something doesn’t feel comfortable – don’t do it.

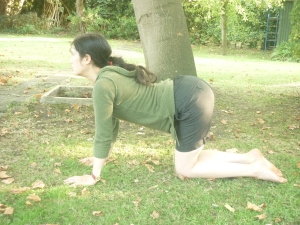
PRACTICE: Be on all fours making sure that the knees are directly underneath the hips and the hands are underneath the shoulders…. Spread the fingers wide with the thumbs reaching in towards each other. Take a moment to bring awareness to your breathing… The next time you breathe out imagine you are bringing your navel towards your spine and arch up. Then when you breathe in allow the belly to drop creating a downward arch. Be aware of keeping space at the back of the neck and not lifting the head too high.

Carry on arching up on the out breath and arching down on the in breath as long as it feels good for you to do…Finish on an upward arch breathing out….

Come to kneeling and rotate the wrists both ways. Then relax in Child’s posture for a few breaths…

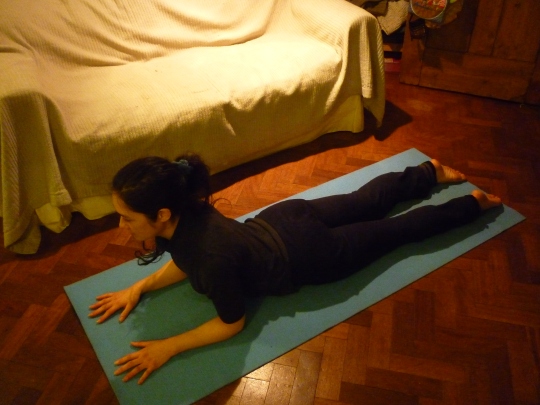
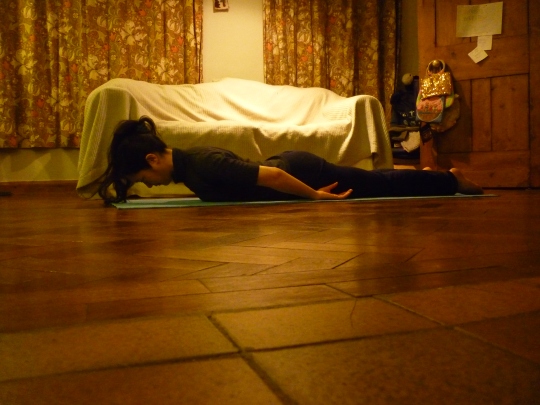
sphinx

locust - salabhasana

BENEFITS: Can tone the legs and abdominals. Strengthens the back muscles. May be beneficial for sciatica. Some people with slipped discs can also find this posture helpful (but do check with a yoga teacher or GP before trying)

CONTRAINDICATIONS: Obviously pregnancy puts some restraints on practicing this posture! Most mother’s to be will find up until 12 weeks comfortable to do – but listen to your body – as we are all unique and different. Only practice if it feels comfortable and good to do…

PRACTICE: Lie prone with your arms resting at the sides of your body – palms facing up, eyes looking towards the ground. (You can shut them if you want to…)

If it feels uncomfortable on your nose, roll up the front of your mat and place it underneath your forehead.

When you lie on your front, the back of the neck often lengthens quite quickly. If this is happens to you, lift the forehead, and place it a little further away from yourself.

Relax completely and breathe…

Take a journey around your body and see if there is anything still holding. If there is then imagine you are breathing into it. Visualise the area softening and releasing.

Breathe freely and easily…

Notice your spine moving as you breathe…

When you are ready, engage the thigh muscles the next time you breathe out. Allow the legs to become heavier and lengthen the tailbone away.

As the tailbone lengthens away, you may feel a gentle ripple travel up your spine…An undulation, which when reaching the upper vertebrae brings some lightness there. The shoulders and head may come off the ground…

But just a little bit – be aware of keeping space at the back of the neck – so that your gaze is still towards the mat.

As you breathe in, relax and give into the ground again.

Keep playing with going up on the exhalation and resting and preparing on the inhalation.

Rest when you have had enough and enjoy giving into the ground once again for a few moments.

Child’s pose is a good counter pose to do after locust…

* I have shown the upper body raise for now as I feel it is easier to obtain a feeling of relaxation and spine lengthening than when you also raise the legs…

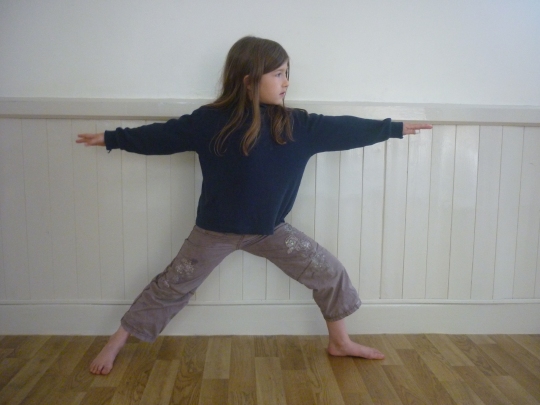
Virabhadrasana I

BENEFITS: Improves body strength – especially in the thighs and shoulders. Increases  hip flexibility and can help one to feel more confidant!

CONTRAINDICATIONS: Practice very gently if you have any knee conditions. Don’t hold the posture for too long if you have very high, or very low blood pressure.  As with all poses of the week – if something doesn’t feel comfortable – don’t do it.

PRACTICE: Stand sideways on your mat or be on a non slip surface. Take a large step to your right…

Check that the outside edges of your feet are parallel to each other. Bend one knee and then the other a few times…

Come to still and be tall and grounded. Take a moment to breathe…

Notice how open and in which direction your pelvis and shoulders are facing – You want to keep them like this throughout the posture….

Turn your left toes 90 degrees out to the side and bend your left knee (make sure the knee is going in the direction of your toes)

Raise your arms in line with your shoulders and look past your left fingertips. Be grounded, tall and brave… Breathe…

Stay for a minute or two or as long as it feels comfortable and good to be doing…

Students and other yoga teacher’s often ask me about my personal practice – How often and for how long?

So here it is:

I try to begin everyday with two salutes to the sun. Sometimes I will also do a few of the astanga salutes (to keep my arms nice and strong!)

Time allowing, I will also do a twist – usually lying down and a side bend. Which means that at the very least I have done the 6 movements of the spine (forward, back, rotation to both sides and side bend – both sides) every day.  I will also do a wheel from lying 2 or 3 times – in the most relaxed way possible.

Because I don’t want to wobble when I teach a balance during a class, I also try to do tree, warrior 3, half moon and some variations of  uttitha hasta padangusthanasana most days.

If I have the time (rarely!), I will go with how my body feels it wants… Pranayama is then likely to make an appearance…

Sometimes, I have the luxury of a few moments of relaxation in savasana…

I read once, that as a yoga teacher, you should do no less than one hours practice every day (or woe betide you!) I would love to achieve this, but at the moment – even with the best intentions in the world – its just not physically possible (3 children, home educating,  teaching etc for starters!)

Yoga is close to my heart though and with me for much of the day. If I’m ever still for a period of time, I need to move and stretch and I will… If I see a bar to hang from – I usually do.

During the day, I will forward bend at least twice.

On the bed, before sleeping, I often do dandasana – staff pose and usually a lying tailor and of course some much needed relaxation…

Getting bigger?

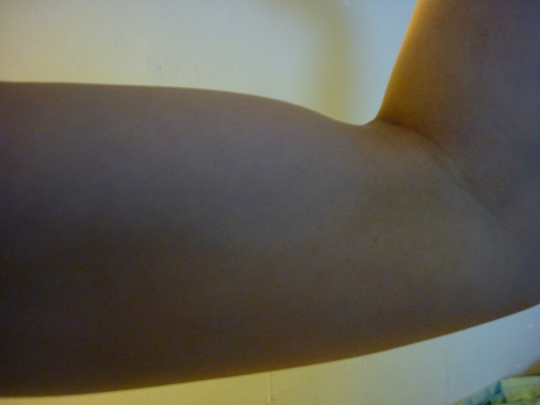
In short – yes of course!  But I know and have heard of quite a few women not doing Astanga because they are worried about how big it will make their arms and shoulders – men don’t seem to have a problem with this!  I thought I’d do a little personal study and practice Astanga daily after a period of ‘rest’ and see how big my biceps actually get after one month.

I begin on the 13th of January. It feels rather self indulgent measuring body parts… With a long unflexed arm my bicep measures 24cm – when flexed it is 25cm.

After one practice my unflexed bicep measures 24.5 cm and when flexed 25.5cm.

By the 15th January my unflexed bicep stays at 24.5cm but flexed it is now 26.5cm.

These measurement are taken straight after practicing. On the 17th and 18th January the measurements are the same as the 15th – but I also take a reading about 10 hours after practicing – both days show a decline in muscle growth – back to the original size of 24cm unflexed and 25cm when flexed.

On the 13th of February at the end of the one month of Astanga my unflexed bicep is 24.5cm and flexed up to 26.5cm.

So in a month a total bicep growth of 0.5cm when unflexed and 1.5cm when flexed.

I haven’t been able to measure the growth of the muscles in my shoulders – they definitely look stronger – especially the Deltoid muscles (top outer corner of shoulders) and the Pectoralis Major muscles. Although I only really notice this new definition if I happen to be brushing my teeth and happen to look in the mirror.

14th of February – no Astanga today as I think it would be good to see if there is a decline in muscle tone after missing one practice. Bicep – 24cm when unflexed – back to original size! and 25.5cm when flexed – just 0.5 cm more than when I started – Gosh what a quick decline….

Astanga yoga has really forwarded my physical practice and made my arms and abdominal core muscles much much stronger.  Even after a few years of being a yoga teacher and very comfortable in a dog posture, I was never able to do a proper push up. Navasana – boat pose has always seemed impossible – but Astanga makes you do these postures and I can now do a push up with the best of them and Navasana – looks nearly (but not quite!) effortless…

If you enjoy pushing yourself physically than Astanga can be fantastic – it can feel so good to do and after a practice you feel like you have really moved. A shame to miss out on because of possible bicep growth!

So yes, Astanga does make your arms and shoulder’s look stronger – but not too much! They then seem to go back very quickly to the size they were if you don’t practice for a few days – In my case anyway! Everybody’s body is different and unique… and so what if your arms get bigger because you have strengthened them!

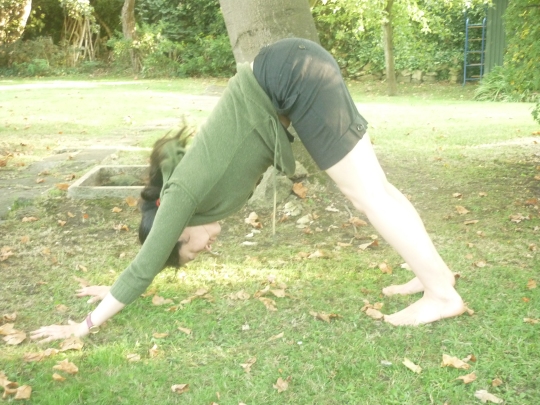
dog pose - adho mukha svanasana

BENEFITS: Lengthens hamstrings and increases strength in the wrists, shoulders and arms. This posture is great for the circulation and can give you extra energy.

CONTRAINDICATIONS: If you have high or low blood pressure, only stay in the posture for a short while – say one breath to start with. Any back condition, keep the knees a little bent to soften the pose. As with all postures of the week, only practice if it feels comfortable and good to do…

PRACTICE: Begin on all fours… spread the fingers and thumbs wide. Then find a relaxation in the hands and just let them be heavy on the ground.

Tuck the toes under and breathe in to prepare…

As you breathe out, bring the pelvis up into the air.

Relax the head and keep the knees bent to begin with.

Notice how your body feels and then begin to move in. Whatever feel good for your body to do. Bending and straightening the legs if that feels okay… Bending each elbow (dogs have four legs!), Maybe coming right onto the toes. Moving the pelvis from side to side…Have a little play…

At some point you could find some stillness in dog. Imagine a string attached to the back of the pelvis gently pulling you upwards…

Breathe and feel the body long, strong and lengthening…

Enjoy the strength and lightness of your body.

When you feel you’ve had enough, rest in child (kneeling with the upper body folded over the knees) and breathe…

* The above photo is of me doing a rather ‘short’ dog. To make the posture longer, simple walk the hands a little further away from the feet.

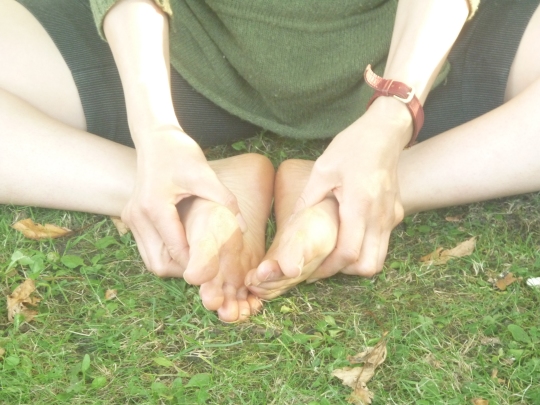
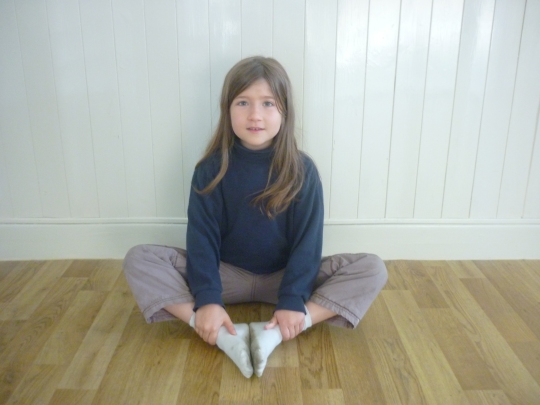
Tailor - Baddha konasana

BENEFITS: Improves flexibility in the hips, tones the abdominal muscles.

CONTRAINDICATIONS: Do not practice if you have SPD – Symphysis pubic dysfunction.   As with all poses of the week – if something doesn’t feel comfortable – don’t do it for now….

PRACTICE: Begin by sitting on the ground with the knees bent and the soles of your feet together.

Allow your pelvis to be heavy and relax your hips…The feet will begin to unfold like an open book.

Visualise the spine being long…

If it feels an effort to keep the body upright, then place part of a cushion just underneath the tailbone. If the knees feel too heavy – place some cushioning underneath them for support.

Be aware of your sitting bones and the contact they have with the ground. Circle around them one way, then circle the other way. Come to still in the centre of these circles…

Pelvis heavy, with sitting bones very much in contact with the ground. Hips released and spine like a growing plant seeking the sky…

Breathe…

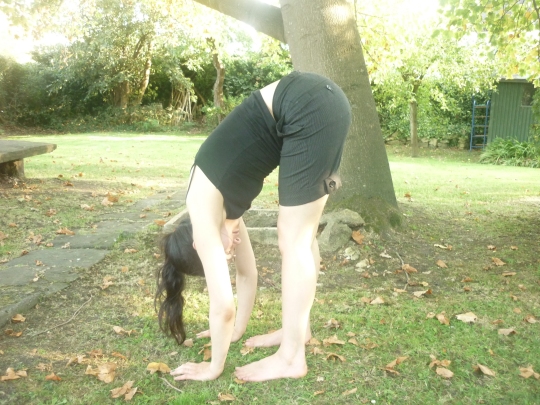
curling forward bend - uttanasana

BENEFITS: Increases flexibility in the hips, hamstrings and back. This posture is detoxifying as it massages the internal organs.  Can increase brain power due to extra blood supply to the head.

CONTRAINDICATIONS: If you have any back conditions, or your hamstrings are very tight, but it still feels good to do uttanasana, keep your knees bent throughout the posture and rest your hands on a chair or sideboard. As with all poses of the week, only practice if it feels comfortable…

PRACTICE: Stand in Tadasana – with your heels a little narrower than your hips and directly underneath your sitting bones – the outside edges of your feet parallel to each other.

Breathe in to prepare and then as you breathe out, gently bend your knees and let the head roll forwards and follow the head vertebra by vertebra, rolling down the spine and finally bending at the hips, until you are as far as you can comfortably go.

Don’t try to reach for the ground, just let the upper body give in to gravity and breathe…

If it still feels good, straighten one leg and then bend it again. Do the same with the other leg. Keep doing this a few more times and then if still at ease, straighten both legs.

Breathe and enjoy the lengthening of the whole of the back of the body. Stay here as long as it feels good.

When you are ready to come out, take a breath in as preparation, bend the knees and send the tailbone down, coming up vertebra, by vertebra.

Gently shake out the arms and legs.

You might now feel as though you want to go into child as a counter pose and have a little rest….

One of the benefits of doing yoga...

I have a theory (not scientifically tested yet…) that the more flexible you are the more comfortable you feel lying on the ground.

So, with lots of yoga practice… sleeping in a tent and a good night’s sleep could actually go together.

Studies have shown that yoga – due to the many weight-bearing postures – can make bones stronger and guard against osteoporosis. Yoga officially keeps bodies younger – one scientific way of calculating ageing is to measure hip flexibility which will always be good if you regularly practice yoga.

Climbing gets easier the stronger and more flexible you are. (If you are not afraid of heights!)

The longer you have been practicing yoga the more able you are to scratch your back in just the right places.

Balancing on one leg, putting on a sock or shoe shouldn’t be too much of a problem.

If you are having sex and happen to find your feet next to your head – you will not be in pain and could still be enjoying yourself.

If you are on your own, doing up a top with buttons on the back can actually be possible.

Should you ever find yourself on a static trapeze(!?) you should be able to make some nice shapes.

First my eldest Louis was diagnosed with exercise induced asthma when he was about 5 – now 11 he seems to have grown out of it.

My middle child Esmée was also diagnosed with asthma about two years ago when she was 5 – It also seems to be exercise induced – but especially when there is dust and pollen about. Colds nearly always go to her chest and also cause wheeziness.  Doctors have said that she will have it for life and her asthma symptoms have always appeared to be much worse than Louis’

Not happy accepting this verdict until other possibilities of helping her condition have been explored – we have tried a number of options – some of which have remarkably improved her condition – so much so that she appears not to have to use her inhalers at the moment (we do keep them with us just in case though…)

Steaming with very hot water and a drop of water seems to sometimes help a little when she has been wheezy with a cold in her chest – but the relief only lasts about 30 minutes or so.

Quercetin a food supplement to be taken 3 times a day after following a dairy free diet for a few weeks was recommended by our local  health remedy shop.  This helped her asthma quite alot. Before taking it Esmée was only able to run around for about 5 minutes before becoming incredibly wheezy. After taking the Quercetin she could run around and not get wheezy at all – only after a rather hard game of football would wheeziness come on.

Surprise surprise the Quercetin got rid of her hayfever completely!

Unfortunately the Quercetin was aimed at adult takers – large capsules with Quercetin powder inside. I would take the powder out and mix it with honey. This was fine at first – but then the sweetness of the honey began to make Esmée feel sick – so she stopped taking it. I thought maybe the effects of having the supplement would remain – but after a few weeks the usual wheeziness and hayfever came back.

We then tried homeopathy – I don’t think it has actually helped her asthma on the surface – but I‘m hoping that it has helped her work through and hopefully shake off many of the other hereditary lung conditions – so that the asthma is now not so deeply embeded in her system – am not sure…. Maybe we have to work a little more with this… But we were going to a low cost  student training clinic with a very lovely and experienced homeopath – but because of the low cost it was over subscribed and difficult to get followups etc

Being a yoga teacher, we practiced various chest opening postures such as Cobra – Bhujangasana and Fish – Matsyasana – These seemed to give a feeling of being able to breathe freely during the posture, but didn’t help at the time afterwards…

Next we tried osteopathy… I have heard really good reports about  ‘The Village Osteopaths”  – Wesley Tan and his wife Clare Berthier. Clare was just about to give birth, so we couldn’t see her – but Wesley was available – On entering the house there was the lovely sweet smell of breast fed baby – Clare had given birth a couple of days before.

Wesley’s manner was kind and relaxed with Esmée and she seemed to be very at ease.

There was some tightness in her left side which was worked on and loosened.

Time was also taken on expansion of the ribs.

The full breath with maximum efficiency which Desikachar describes in his book ‘The Heart of Yoga,’ on page 22 was worked on. I’m not sure I could have taught it to Esmée – but Wesley demonstrated it to her in a way that she could follow.

One of the things Esmée and I appreciated about the session was being shown via pictures from some amazingly detailed anatomy books and Wesley’s vivid explanations the action of the breath and what was happening in Esmée’s body and what we were trying to achieve in the session.

When we left I asked Esmée how she felt – she said “I feel as though I will never get wheezy again”

Before we went to the osteopath Esmée could go on the trampoline for about 5 minutes before having to rest because of wheeziness. Now she can literally go for hours and not get wheezy at all.. If she does get wheezy due to dust or pollen – it helps if she raises her arms or does some of Desikachar’s ‘full breaths’.

Every now and again we practice some of the breathing and some of the open chest positions which I mentioned earlier such as Matsyasana and Bhujangasana. We also work on keeping flexibility in the spine – especially in the upper sections which support the lungs.

I am still amazed at the before and after of going to see Wesley and cannot recommend his practice enough. See links page for their website. Since then I have heard of other success stories with asthma and osteopathy – It seems that the effects don’t last for ever. But if you become tight again – more yoga and breathing and another visit to an osteopath would hopefully help the asthma again.

I don’t know how long this will last with Esmée – but at the moment its great!

I have also heard some success stories with acupuncture and asthma – but felt Esmée was too young for this – maybe when she is older if she keeps getting chest colds etc
Here is our crowdfunder! Help us if you can…

http://www.crowdfunder.co.uk/school-of-larks/

Thank you! xx

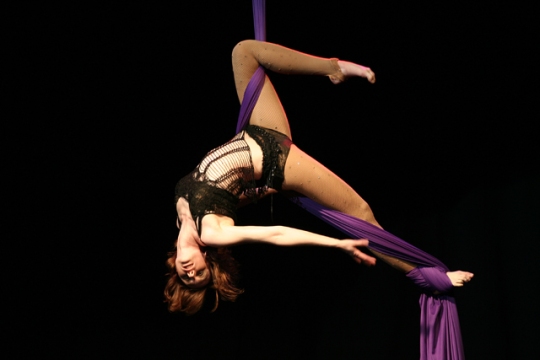
I am just about to set up some static trapeze classes. I have been assisting similar sessions in Cinderford – but am now about to start teaching my own. I am very excited! It’s not something I ever invisaged I would be doing – but somehow – it crept up on me : )

The yoga has been amazing in helping me be strong enough and flexible enough to be able to hold my own body weight and get into the required shapes. Definitely, I would not be about to teach this amazing art – if the yoga hadn’t been an integral part of my life.

Image


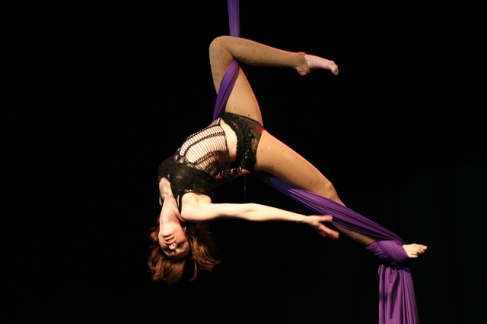
The above picture isn’t me! I’m not at the stage where I can teach silks yet – but thanks to yoga – I might be able to in the not too distant future!

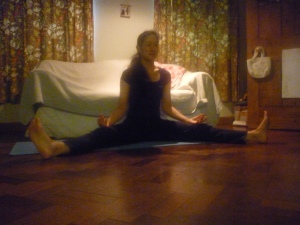
wide leg sitting – upavistha konasana

Benefits:  Can strengthen the muscles around the knees and help this area from feeling so vulnerable. Also strengthens the abdominal muscles and can improve flexibility in the hips and hamstrings.

Contraindication: This is generally a very safe posture to practice, but if it feels a strain keeping the upper body upright,  place a cushion just underneath your tailbone. This will give you some extra support and make the posture feel much more pleasant to do.

As with all poses of the week – if it doesn’t feel good to be in – don’t do it for now (until you have the advice of an experienced yoga teacher…)

Practice:  Sit on the floor with your legs comfortably wide. Placing hands wherever they feel relaxed – resting on the belly, or on the thighs…

Allow your hips and legs to be heavy and feel the sitting bones very much in contact with the ground…

Have an awareness of your spine being long and gently lengthening upwards.

Breathe easily and freely…

Stay in this posture as long as you feel happy being here…